Sunday, September 8, 2013

Slow Cooker Beef Barley Stew

I can't give my review on this one as I just froze a couple of bags for the freezer for later.  I have tried a few beef stews from the "freezer recipe" collections and not all have been good but this one seemed a bit different.  And I really enjoy the barley instead of potato!  I took this from the Happy Money Saver site. She says she puts everything except carrots and water in the bag, uncooked, for freezing then tosses it all into the slow cooker.  I decided to par boil the carrots to get them a bit soft and threw them in as well. So I will only need to add water on the day of cooking!  I'll let you know what I think when we have it.

1 lb Beef Stew Meat, (diced small)
1 1/4 cups sliced or chopped carrot
1 1/4 cups chopped onion 
 3/4 cup chopped celery
5 Cups Water
1 tsp parsley flakes
1/4 tsp pepper
1 tsp granulated sugar
2 TBSP Beef Bouillon powder
1/2 cup pearl barley
15 oz can tomato sauce
Place all ingredients in a 5 quart slow cooker or Crockpot. Stir it up. Cover and cook on low for 8-10 hours on low or 4-5 hours on High.

Saturday, August 3, 2013

Goat Cheese and Fig Mmmmmmmuffins

I have had this recipe in my inbox for ages and decided to try them today. They are delicious! 
The goat cheese mixture is...not much like goat cheese at all! The honey seems to soften the flavour. 
Oh, and I forgot to sprinkle with sugar and it didn't seem to matter. Looking forward to breakfast this week!

Honey & Goat Cheese-Filled Fig Muffins
  • 3/4 cup crumbled soft goat cheese, or cream cheese;
  • 2 tablespoons
    honey
  • 1 teaspoon
    lemon zest, freshly grated
  • 1 1/4 teaspoons
    vanilla extract, divided
  •   2 cups
    white whole-wheat flour
  • 1 1/2 teaspoons
    baking powder
  • 1/2 teaspoon
    baking soda
  •   1/4 teaspoon
    salt
  • 2 large
    eggs
  • 1 large
    egg white
  • 3/4 cup
    brown sugar, packed dark or light
  • 1 cup
    buttermilk, low-fat or nonfat
  • 1/3 cup
    extra-virgin olive oil
  • 1 1/4 cup
    dried figs, chopped
  •   3 tablespoons
    turbinado, or granulated sugar

  1. Preheat oven to 425°F. Line 12 (1/2-cup) muffin cups with paper liners or coat with cooking spray.
  2. Thoroughly combine goat cheese (or cream cheese), honey, lemon zest and 1/4 teaspoon vanilla in a small bowl. Set aside.
  3. Whisk flour, baking powder, baking soda and salt in a large bowl. Lightly beat eggs and egg white in a medium bowl; add brown sugar and the remaining 1 teaspoon vanilla and whisk until the sugar is dissolved, about 1 minute. Gradually whisk in buttermilk and oil until smooth. Add the wet ingredients to the dry ingredients and stir until just combined; do not overmix. Fold in figs.
  4. Spoon half the batter into the prepared muffin cups. Add 1 generous teaspoon of the reserved cheese filling to the center of each muffin, and cover with the remaining batter. (The filling should not be visible.) Sprinkle the muffins with sugar.
  5. Bake the muffins until the edges start to brown and the tops spring back when gently pressed, 13 to 15 minutes. Let cool in the pan for 5 minutes before turning out onto a wire rack to cool.

Sunday, June 23, 2013

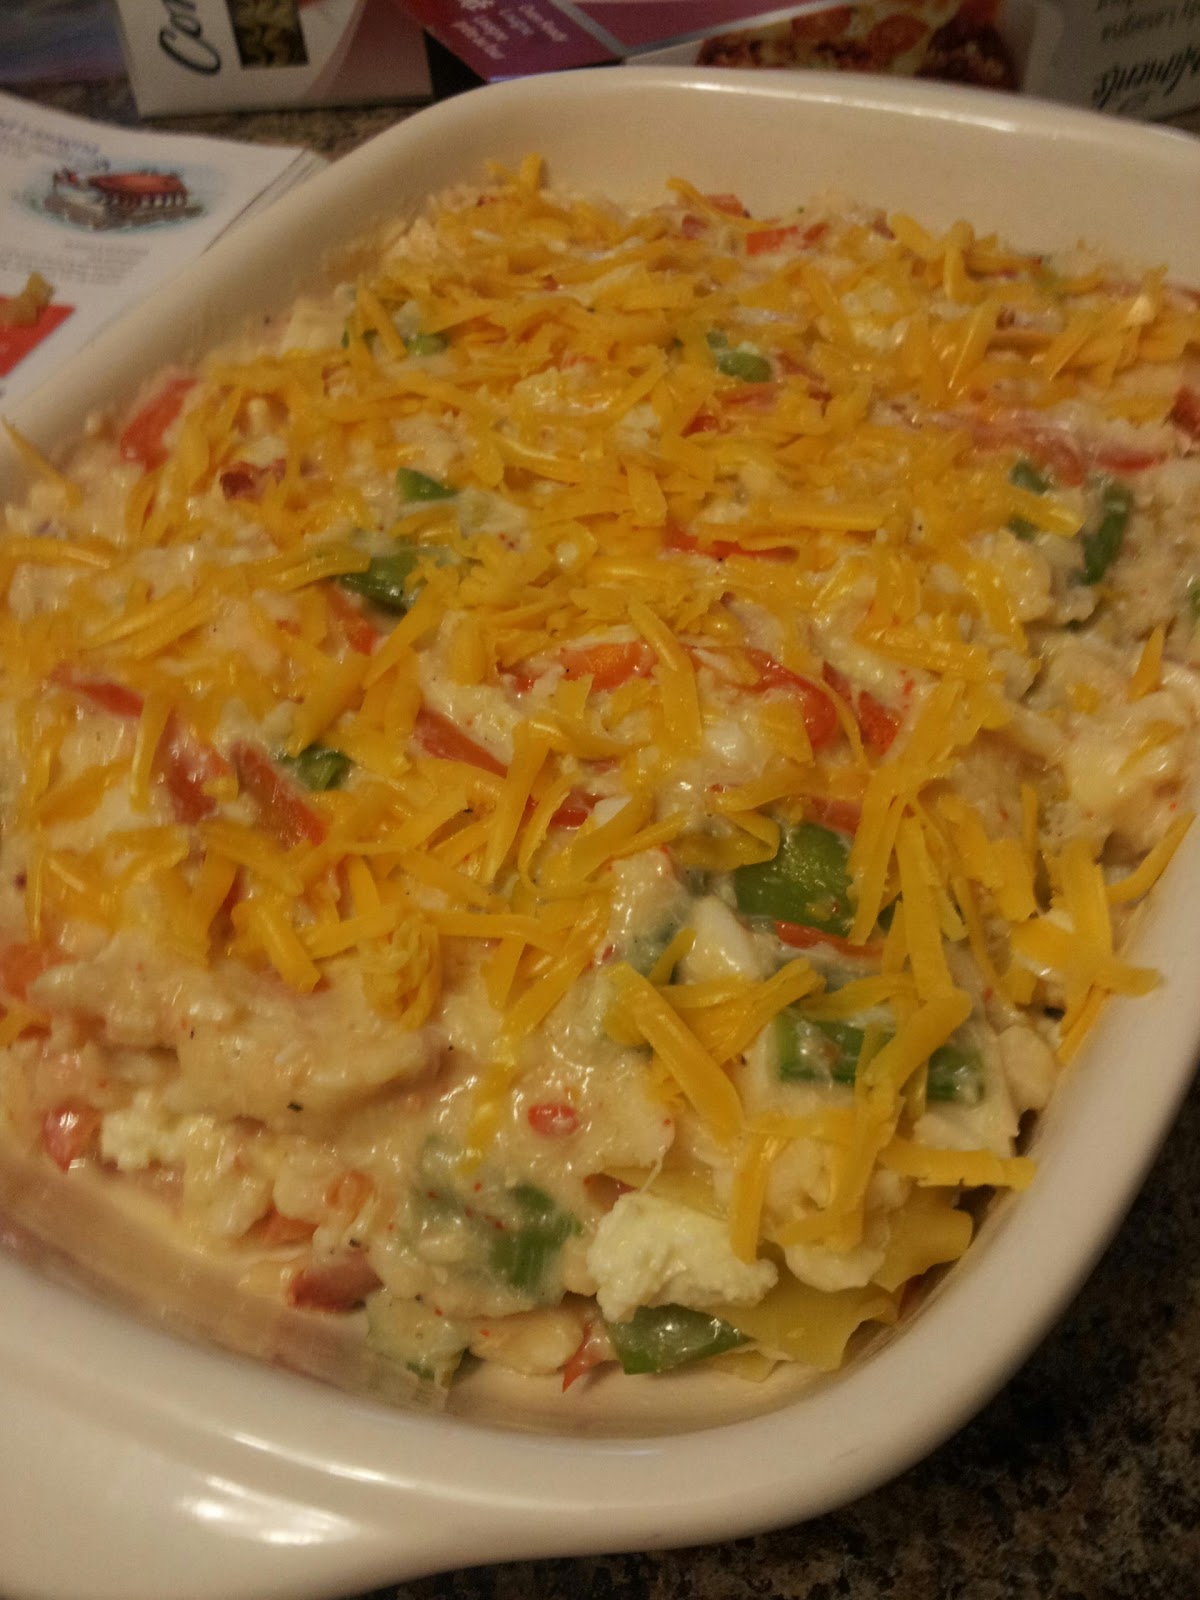
Seafood Lasagna

12 lasagna noodles
1 cup trimmed and halved snow peas
1 cup thinly sliced red bell pepper
1 1/2 cups part-skim ricotta cheese
1/4 cup freshly grated Parmesan cheese
1 egg
1 tbsp butter
2 tsp minced garlic
2 1/2 cups 1% milk
5 tbsp all purpose flour
2 tsp reduced sodium chicken bouillon powder
1/2 tsp each dry mustard and pepper
1/4 tsp salt
3/4 pound (340 g) bay scallops
3/4 pound (340 g) lump crab meat, chopped or bite sized pieces
3/4 cup packed shredded light old cheddar cheese, divided
1/4 cup minced fresh parsley

1.Prepare lasagna noodles according to package directions.  Drain.  Rinse with cold water and drain again.  Set aside.
2. Place snow peas and red peppers in a microwave safe dish with 1/4 cup of water.  Heat on high power for 3 minutes.  Drain and set aside.
3. In a medium bowl, mix together ricotta cheese, parmesan cheese and egg.  Set aside.
4. To make sauce, melt butter in a large pot over medium heat.  Add garlic.  Cook one minute.
5. Whisk together milk and flour until smooth. Add to garlic in pot.  Increase heat to medium-high.  Stir using a whisk.  Cook until mixture is bubbly and has thickened about 7 or 8 minutes.
6.Stir in bullion powder, dry mustard, pepper and salt.  Add scallops.  Cook until scallops are opaque about 5 minutes.  Stir in crab meat, 1/2 cup of cheese, parsley, snow peas and red pepper.  Cook for 1 more minute until cheese is completely melted.  Remove sauce from heat.
7. Spray a 9 x 13 baking dish with cooking spray.  To assemble lasagna, cover bottom of baking dish with 3 noodles.  Pour 1/3 sauce over top.  Layer 3 more noodles over sauce.  Spread all of the ricotta-parmesan mixture over noodles, followed by 1/3 of the sauce.  Top with 3 more noodles, remaining sauce and sprinkle remaining 1/4 cup of cheese over top.
8. Cover with foil and bake at 350 for 40 minutes.  Let stand for 5 minutes before serving.

This is from the Looneyspoons Collection, originally called "Anchors A-weigh Seafood Lasagna".  I have made it as the recipe calls and again when I had some left over lobster to use.  I replaced the scallops with the lobster and kept the crab meat as called for.  It is very rich, one piece goes a long way.  I am sure you could use any variation of seafood that you like in this recipe.

Sunday, June 2, 2013

Summer Break & Falafels

We have decided to not meet and swap over the summer months.  As much as we have enjoyed getting together and exchanging meals, we have busy lives which often made it challenging to squeeze in the massive meal preps and even finding a convenient time to meet! We figured with the nicer weather and some vacation time ahead over the next few months, we would break for June/July/August and reconvene in the fall.  We also agreed that most of us tend to do more salads and grilling in the summer so our need for freezer meals would likely be less.  I still want to have a few things in my freezer so I've decided to freeze a few meals into lunch side portions instead.  Although making suppers is easier when we are BBQing, we never seem to have anything left over...which is my preferred choice of packed lunch.  Last week I made some Moroccan Stew and last night I made up some Thai Meatballs.  I also decided to try a Falafel recipe that a coworker had made and I instantly thought, "they would be great for freezing!" so here is the recipe.

FULLafel Patties (from the Looneyspoon Collection)

1 can (19 oz) chick peas, drained and rinsed
1/2 cup red onion
2 tbsp lemon juice
2 tbsp all purpose flour
1 tbsp tahini
1 tsp garlic
1 tsp ground cumin
1/2 tsp each coriander, chili powder, salt
1/2 tsp baking soda
1/8 cayenne pepper
2 tbsp olive oil, divided

Add all ingredients except olive oil to the bowl of a food processor.  Pulse on and off, occasionally scraping down sides of bowl, until mixture is the consistency of very thick cookie dough.  Transfer mixture to a bowl, cover with plastic wrap and refrigerate at least 1 hour (it will firm up).

Using about 2 tbsp "dough" per patty, form mixture into 15 balls.  Using your hands, flatten balls slightly to form 2 inch patties.

Heat 1 tbsp oil in a 10 inch skillet over medium-high heat.  Add half the patties to the skillet.  Cover and cook for about 3 to 4 minutes per side, until patties are lightly browned and heated through.  Be careful not to burn them.  Remove patties from skillet and keep warm.  Cook remaining patties in remaining 1 tbsp oil.  Patties will firm up a bit if left to cool slightly before service.

Now this was my first time making them, so I learned a few things! I found my texture too sticky and in hindsight should have added a little more flour.  I probably threw in too much lemon juice (and I am terrible for not measuring anything when I cook!).  I also did not have tahini so I used peanut butter, but I doubt if that would have affected things too much.  Just make sure the texture is not too wet as it makes it harder to roll into balls (as happened to me).  Also, my patties didn't really fill out much so I question how well my baking soda worked. I am not a baker, so it is possible it has been in my cupboard for a year - should have checked the expiry date first!  Having said all this, the taste was delicious!  I will definitely try making them again...and did freeze me results for some quick lunches this summer.

I also made up a fruit salad which has a really tasty sauce you might enjoy.

Rootie Toot Fruit Salad (Looneyspoons Collection)

2 cups low fat plain greek yogurt
2 tbsp liquid honey
1 tbsp frozen orange juice concentrate
1 tsp orange zest
6 cups chopped fresh fruit

To make dressing, mix first four ingredients together in a small bowl.  Cover and refrigerate for 1 hour.
Stir dressing and fruit together in a large bowl.  Serve immediately.

I have put all my fruit into a separate bowl and just toss with dressing prior to eating a single serving. I threw a little granola on top to make it a breakfast meal. It has a really nice tangy orange taste to it!

Wednesday, May 15, 2013

Cheesy Leek and Potato Pie


This is from 
http://www.amuse-your-bouche.com/recipes/

This was one I've had my eye on for a while and never made. Easy to make and yummy to eat (we had it for supper tonight).


Makes one large pie (around 12 inches)

1 frozen pie crust
1tbsp oil
1 leek, halved lengthwise then sliced (Don't forget to wash them!)
2 cloves garlic, minced1lb potatoes1.5 tbsp butter, softened
200g cheddar cheese, grated
2tbsp fresh parsley, chopped
1/4tsp mild/medium curry powder
1 egg, lightly beaten
3tbsp milk

Heat the oven to 200°C (Gas Mark 6 / 400°F).

Heat the oil in a frying pan, and cook the leeks and garlic over a medium heat for around 5 minutes, stirring occasionally, until the leeks are soft.

Meanwhile, chop the potatoes into fairly small chunks (I left the skins on), and boil for around 15 minutes, or until the potatoes are tender. Drain and set aside to cool for a few minutes.

Use a fork to lightly mash the potatoes – they should not be completely smooth, but you don’t want huge lumps left either. Add the leeks and garlic, butter, parsley, curry powder, egg, milk, and half of the cheese. Mix well. Transfer the mixture to the pie crust, and spread out into an even layer. Top with the remaining cheese, and bake for a further 25-30 minutes, until the cheese is crispy and the crust is fully cooked. I finished it under the broiler for about 2 minutes.

Friday, May 10, 2013

Chicken and White Bean Enchiladas with Creamy Salsa Verde


I just made these for this months's meal swap and they were really good!  I did make a couple of mistakes though.  I had a small amount of curry powder in a little bag that I somehow mistook for cumin, so I added about 2.5 teaspoons of curry to this dish!  Curry is such a strong taste that I tried to add a little extra cumin to try to counteract it, so it might have a lot of flavors competing! For our vegetarian friend, I just added some extra beans (she did not get the curry error, so we'll see what she thinks...if it's too bland without it!) and used vegetable broth.  I also forgot to top all of them with the fresh cilantro I had specifically bought just for this recipe! I think I have done this in the past too.  If I am cooking for us at home, I don't always bother with fresh garnishes...so this is likely why I forgot.  I prepared the filling ingredients (with cooked chicken, I bought a couple of rotisserie chickens at the grocery store to make life easier) and then prepared the sauce but I did not bake it all together.  I froze it prior to baking.

Warning: They do have a little heat to them.  I reduce the jalapenos (even though I love them, not everybody else does!!)

This is from the skinnytaste.com blog!

Chicken and White Bean Enchiladas with Creamy Green Chile Sauce
Servings: 8 • Serving Size: 1 enchilada • Old Points: 4 • Points: 5
Calories: 230 • Fat: 7.3 g • Protein: 20.4 g • Carb: 28.7 g • Fiber: 12.2 g 
Ingredients:
For the Chicken and White Bean Filling:

  • 1 tsp olive oil
  • 1/4 cup minced white onion
  • 2 cloves garlic, minced
  • 1 can (4.5 oz) chopped green chiles
  • 15.5 oz can Navy beans (or Cannellini beans)
  • 8 oz cooked shredded chicken breast
  • 1/3 can water
  • 1 chicken bullion
  • 1 tsp cumin
For the Green Chile Enchilada Sauce:
  • 1 tsp butter
  • 1/2 cup chopped white onion
  • 2 tbsp flour
  • 1 cup fat free chicken broth
  • 7 oz can chopped green chile
  • 2 jalapeƱos, chopped (I used jarred)
  • salt
  • 1/2 cup light sour cream
  • 3/4 cup reduced fat Mexican cheese
  • 8 medium low car tortilla 
  • chopped fresh cilantro or scallions (or both!)
Directions:
Preheat oven to 375°.
For the Filling:
In a medium pan, heat olive oil on low. Add onions, garlic and saute until soft, about 2-3 minutes. Add green chiles, beans, water, bullion, and cumin. Mix well and cover. Simmer on low 15 minutes. Remove cover, add chicken and cook an additional 5 minutes, or until it thickens and liquid boils down. Set aside.Green Chile Enchilada Sauce:
In a large nonstick pan, melt the butter over medium heat. Add onion and cook, stirring occasionally, until the onion softens and starts to turn translucent, about 3-4 minutes. Add flour and stir well. Cook for 1 minute, stirring constantly. Slowly whisk in the chicken broth. Whisk until the sauce becomes smooth. Cook over medium heat until the sauce boils and thickens, about 4-5 minutes. Add green chiles, jalepeƱos, and salt to tatse. Cook another minute then remove from the heat. Stir in the sour cream.
Spread about 1/4 cup of the enchilada sauce on the bottom of a 9x13" baking dish. Fill each tortilla with 1/3 cup of the chicken/white bean filling. Roll the tortillas and place seam side down in the prepared baking dish. Continue filling remainder of the tortillas.
Pour the enchilada sauce over the top of the enchiladas. Top with cheese. Cover with aluminum and bake 20-30 minutes, until the enchiladas are hot and the cheese is melted. Remove from oven and top with fresh cilantro or scallions.

Tuesday, May 7, 2013

Avocado Risotto


Love avocados, but get tired of having them on burgers, in wraps, or salad. Found this recipe and we whipped it up tonight. It was too delicious not to share! I'm not sure it'd be a good freezer meal, but it' definitely a good meal deal.
 
Avocado risotto
Author: 
Recipe type: Main meal
Prep time: 
Cook time: 
Total time: 
Serves: 3
 
Ingredients
  • 1tbsp oil
  • 1 onion, diced
  • 3 cloves garlic, minced
  • 190g arborio rice
  • 1 vegetable stock cube
  • ~1l hot water
  • 2 avocados
  • 1tbsp lime juice
  • Salt
  • Black pepper
  • 100g edam cheese, grated or diced
  • 2tbsp fresh parsley, chopped
Instructions
  1. Heat the oil in a large frying pan, wok or risotto pan, and cook the onion and garlic over a medium-low heat for 5 minutes, until soft and translucent. Add the rice and cook for a further 2 minutes.
  2. Mix the stock cube with about 150ml hot water, and add to the pan. Cook, stirring, until the liquid has nearly all been absorbed. Add more hot water around 150ml at a time, again waiting for it to be mostly absorbed before adding more, and stirring regularly. Continue adding water until the rice is cooked – I ended up using just over a litre, but you might need slightly more or less.
  3. Meanwhile, coarsely mash the avocado with a fork, along with the lime juice and salt and pepper.
  4. When the rice is cooked, add the edam, then the mashed avocado and chopped parsley, and mix until combined. Serve warm.
Avocado risotto